Search This Blog

Saturday, 16 July 2016

8x8 card from Linda. DT


Hello, hope you are having a great weekend.

We have another fab post from Linda, this time she has designed a fab 8x8 card for us, this is my personal favourite size card, using some of the contents of the July craft box, for details please click here


8x8 card from Linda 


 Onto an 8 x 8 white square scalloped edge card I matted and layered Kraft card.  Taking 2 of the Prima Vintage Emporium notecards I cut into 2 pieces each measure 7 x 8.5 cm, distressed the edges with Tim Hotlz distress pen aged mahogany.


I then took a piece of the dictionary paper and tore around then distressed with aged mahogany.


Using string from the packaging I wrapped around and then adhered to base card.  I trimmed down the Tim Holtz Found Relative card and matted and layered onto Kraft card.  I added the metal charm which reads "live your dream"
To finish off I added buttons to two corners, 4 blue pearl gems and die cut word friends.


I am sure you will agree this is a fantastic card and she has used just a small amount of materials to make it. 

Linda's blog is -  http://lindasimpsoncraftypieceofheaven.blogspot.co.uk/
You Tube Channel - https://www.youtube.com/user/malta1960

Thanks for looking and I hope you can leave a nice comment

Jules xx


Friday, 15 July 2016

PaperArtsy #3UP - JOFY with Inks

Hello all 

I was really pleased to be chosen to be part of the PaperArtsy #3UP challenge. my stamps are from the  JOFY range.
Jo Firth-Young is the designer and I love her style, the stamps all integrate together
so well and are so versatile.

Please visit the shop and access the blog here  they have amazing rubber stamps and their own range of Chalk based acrylic paints. 

These are the stamp designs I was given to use.


I wanted to make a wall hanging, so choose a Papermache surface.


Using matt medium I covered the surface with book text front and back.


Then I used Lindy's stamp gang sprays over some white cardstock, I sprayed and then rubbed in with a baby wipe to blend the colours


Next I went a bit crazy with spraying Dylusions and Lindy's sprays. so I had to use a white spray over the top to calm it down. I was left with a lovely shimmer. Then stamped one of the floral images, I cut around flowers and set to one side. 


Next I stuck the sprayed sheet on the top of the wall hanging and then stamped the same image.


I added the flowers and some back ground stamps, lightly with a range of ink colours from Archival 


Then I started on the leaves, Stamping in green ink and then I water coloured them with distress inks 


Now for some heat embossing using a gold wow powder and a fantastic word stamp from Jo


I got carried away at this point and forgot to take any more step by step photos lol :) So I repeated stamping and colouring images with sprays and build up a 3D image using the wall stamp (love this one) I also gold embossed some little bee images. 

To finish I used some Classic Treasure Gold, to dust around the sides. I wanted to try and get a good colourful project in 3D and with a bit of a vintage feel and I am very happy with the result.

So here's the finished piece.


I really hope you have enjoyed the process, check out the rest of the blog here

Thanks 

Jules xx


Thursday, 14 July 2016

PaperArtsy #3UP - JOFY with Inks

Hello 

I was really pleased to be chosen to be part of the PaperArtsy #3UP challenge. my stamps are from the  JOFY range.
Jo Firth-Young is the designer and I love her style, the stamps all integrate together
so well and are so versatile.

Please visit the shop and access the blog here  they have amazing rubber stamps and their own range of Chalk based acrylic paints. 

These are the stamp designs I was given to use.


I wanted to make a wall hanging, so choose a Papermache surface.


Using matt medium I covered the surface with book text front and back.


Then I used Lindy's stamp gang sprays over some white cardstock, I sprayed and then rubbed in with a baby wipe to blend the colours


Next I went a bit crazy with spraying Dylusions and Lindy's sprays. so I had to use a white spray over the top to calm it down. I was left with a lovely shimmer. Then stamped one of the floral images, I cut around flowers and set to one side. 


Next I stuck the sprayed sheet on the top of the wall hanging and then stamped the same image.


I added the flowers and some back ground stamps, lightly with a range of ink colours from Archival 


Then I started on the leaves, Stamping in green ink and then I water coloured them with distress inks 


Now for some heat embossing using a gold wow powder and a fantastic word stamp from Jo


I got carried away at this point and forgot to take any more step by step photos lol :) So I repeated stamping and colouring images with sprays and build up a 3D image using the wall stamp (love this one) I also gold embossed some little bee images. 

To finish I used some Classic Treasure Gold, to dust around the sides. I wanted to try and get a good colourful project in 3D and with a bit of a vintage feel and I am very happy with the result.

So here's the finished piece.


I really hope you have enjoyed the process, check out the rest of the blog here

Thanks 

Jules xx

Wednesday, 13 July 2016

The Design Team and Linda's Tags.

 Good Evening all

We are at that point again, over the hump and rolling in to the weekend :)

Tonight I would like to introduce you to the design Team for Artful Days Goodie box.

We have Chris & Linda who have both been crafting for many years with both unique styles


 I am a retired teacher, living in Staffordshire with my husband Pete. Mother to two gorgeous daughters and grandmother to four beautiful granddaughters.

I've been crafting for 10/12 years now. My crafting adventure started when I picked up a craft magazine in WHSmiths and discovered some gorgeous vintage wedding invitations. I was hooked. I soon discovered that a good friend of mine had already started card making and had built up a lovely stash of resources so 
could offer me good advice as to where to start!  My friend and I have enjoyed many workshops, classes and weekend craft retreats together, and explored different ideas and various media. 

I'm now enjoying art journaling and mixed media but I still make cards and love creating scrapbooks for family and friends. It's been a wonderful journey so far and I'm still learning! 


I am an avid crafter who loves nothing better than spending time in my craft haven creating and using all my craft goodies. I have been crafting most of my


live in one way or another. My dad taught me how to knit and I can remember sitting next to my nan while she taught me how to knit my dolls clothes which included knickers and vests. I had the best dressed dolly on the street.


I have also dabbled in embroidery and cross stitching as well as crocheting. I learnt to crochet when I lived in Turkey using a fine crocheting hook and cotton 
which they call Dantel. It is very big over there and a lot of the young girls make table cloths, doilies, edgings for towels, pillow cases etc for their bottom drawer.

I got into paper crafting about 18 years ago now. I was looking for some cards to put my cross stitching in to make my Christmas cards and was dazzled by all

 the fabulous papers, glitters, bling etc and that was it I was seriously hooked.


~~~~~~~~~

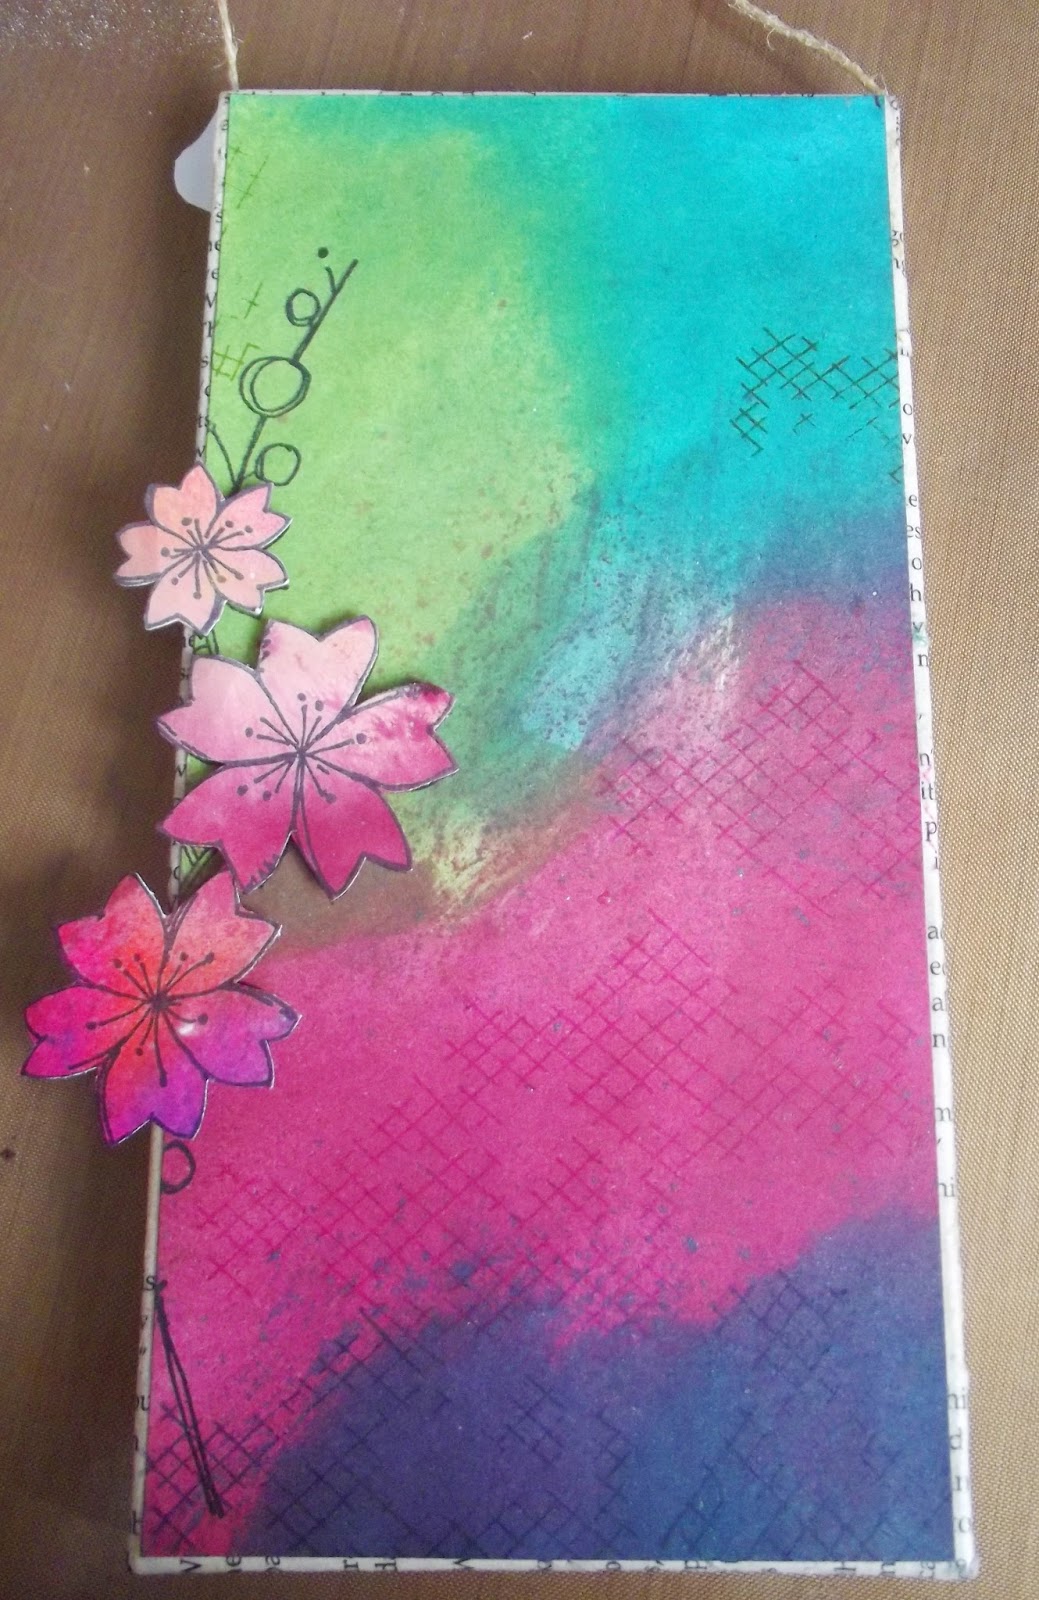
Linda is first up on the blog with her fantastic Vintage tag made from the July Goodie box. 

This is available on the website to order now, just click www.artfuldays.co.uk 
 for further details 


The tag measures 21.5 cm x 9 cm and I have added a double layer of lace to the bottom.


I tore a piece of the dictionary paper and distressed the edges with Tim Holtz Aged Mahogany Distress Ink Pen


I next cut down one of the Tim Holtz Found Relatives card and attached at an angle.


I then cut out the chair from one of the Prima Vintage Emphorium note cards, distressed the edges with distress pen in aged mahogany.


Using my PVA glue with fine nib attached the die cut word cherish


Created 3 flowers with large and small paper flowers and added pearl gems to the centres.


To finish off, I  used the string and curling ribbon from the packaging the goodies came in to thread through the hole at the top and curled the ribbon with my scissors.

Linda's blog is -  http://lindasimpsoncraftypieceofheaven.blogspot.co.uk/
You Tube Channel - https://www.youtube.com/user/malta1960

Thank you Linda, its a stunning tag I am sure you will all agree :) 

One last thing for tonight folks, we are having a give away to share with all your friends, a change to win the 5 fab products below. 


All you have to do is follow our blog, like the FB page and share the post, oh and don't forget to leave a comment on the FB post so that I can put you in the draw.  
Closes on the 27th June.

Thanks, I hope you can leave a comment for Linda, she has some amazing samples coming up as does Chris, so please visit us again :) 

Warm happy crafty hugs

Jules  xxx


Sunday, 26 June 2016

Family Man


Happy Sunday 

I have been crafting using some of the products from the goodie box and made this wall hanging . 

Starting with a piece of grey board I used Prima white gesso to cover and then used an embossing tool to add some extra texture. 


I used some torn music paper and Tim Holtz tissue paper and with mod podge glued it down and coated over the top.


Once this was dry the next step was to add in some colour. I used a distress marker to colour and rub into the texture and papers. 


I had Prima note cards and a Tim Holtz relative which I partly cut round so I could use 3D pads to lift of the page. 


I finished with some embellishments and lace 


I hope you like this project and if you are interested in the goodie box, they are available to pre-order at www.artfuldays.co.uk 

Thanks for looking 

Jules xx