Search This Blog

Thursday, 22 March 2018

We Think Pink Scrapbook Page by Sandra


 Hello crafty People 

Its the second part of "Think Pink" by Sandra, with a matching layout showcasing her wonderful girls. It also goes to show that a few products can go a long way. 


I started by adding Distress Oxide through a stencil. 

Spray with pink and white spray ink, and let it dry between every layer. This creates really interesting effects in the finish 


Add some lace and pearl trim on the left side of the scrapbooking page.

Paint a wooden frame with white gesso and use some gilding wax on it after the gesso has dried.

Cut your photo to fit behind the wooden frame. 


Add gilding wax on the resin pieces too.

I made another stick pin from the Pins & beads set, these look stunning added into the side or back of a design.

Make clusters of flowers and metal embellishments around the photo, and in the upper right corner.


To finish I added a butterfly and some cabochons.


Great layout, I love the effects of spraying white and pink to layer up the colours, sets off the embellishments really well. 

Sandra's Shopping list 


We would love it if you can leave a comment to support our designers.


More can be seen from Sandra on her blog http://crea-sandra.blogspot.com 

Thank you for looking 

Jules xxx


Tuesday, 20 March 2018

Finders Keepers Canvas by Teresa


Hello Crafter's

Tonight Teresa is inspiring us with a reverse canvas using a few products to show you don't always have to have a mountain of craft products to make something fabulous 


Cut paper to fit inside the reverse of the canvas, and another piece to fit around the 'frame'. Take some smaller pieces to layer up inside. 


Distress all the edges with a distressing tool or (carefully with) the blade of your scissors. Then glue into place. Add tissue paper around the sides of the canvas. 


Wrap sisal around one glass vial, and lace around a second. Glue into place with gel medium. Once secure add more gel medium and attach the texture pearls.


Glue some pearls into the bowl of a mini spoon and add a clear dewdrop to the handle. Leave everything to dry. Paint with silver paint and add layers of colour with the sprays and gilding wax. 


Pull a thread from the hessian trim and use to tie on a metal tag to one of the vials. 


Add a Quote chip to the top of the frame along with some more dew drops. 


Glue the spoon in place with gel medium and add a little Distress Ink to the tissue paper to add some colour.


And here is the finished canvas,


I love everything about this canvas, covering the mini glass vials in sisal and Pearl Art Balls is definitely something I will be trying. 

Teresa's Shopping List


Materials used from Teresa's stash
Deco Art Heavy Gel Medium
Distress Ink - Vintage Photo
Tim Holtz Quote Chip and Metal Tag
Deco Art Shimmering Silver Paint
Haematite and Copper Mica Sprays
Deco ArtTreasure Gold Gilding Wax
6 inch canvas

Please leave a lovely comment to support our designers and thanks for looking. 

For more projects for Teresa please check out her blog http://thefatcactus.co.uk and You Tube Channel https://www.youtube.com/channel/UChNbVhMz7jX66gevhKgz5Ig/feed 

Jules xx


Sunday, 18 March 2018

Fairy Canvas By Katie


Evening Crafty Friends 

Another cold and snowy day here today, nowhere better to be than in a nice warm craft room. Katie is brightening our day with a wonderful fairy spring canvas.


Hi all, I have a new mixed media canvas to share using products available from Artful Days.

Start off by spraying the canvas with ink and once dry cover with gesso
Add your textures such as lace, dry wall tape and paper straws. Coat with white gesso and leave to dry.

Spray centre with Purple,Blue and red misting ink

Spray rest of canvas with lighter colours and leave to dry.

Apply a stencil mask around the edges and then glue down a selection of flowers.

Add Creating textures, Micro Beads and gems to the the canvas and flowers.

Paint the wooden word and glue micro beads to it.

Paint the resin fairy with rose gold paint to finish 


Fab canvas with lots of colour, love the gold fairy.

 Katie's Shopping List


If you would like to see more of Katie's projects, please check out her blog https://whatkatiedid2.blogspot.co.uk/

We would love you to support our designers and leave a lovely comment.

Thanks 

Jules xx


Thursday, 15 March 2018

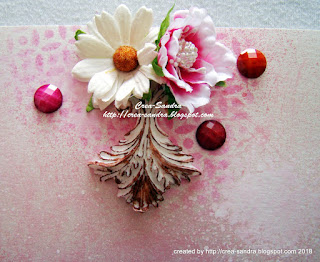
Think Pink by Sandra


Evening Crafter's 

Sandra has made us a wonderful pink scrapbooking page, which I think has a lovely fresh feeling of spring to it.


Start by adding structure paste with the Imperial Circles stencil on the middle right side of your paper, and a small bit in the upper left corner.

Spray with pink and white ink once the texture paste is dry. Make sure to let your ink dry completely between layers.


Coat the Scrapiniec chipboard with white gesso, and pink spray ink.


Add some lace and pearl trim on the right side of the page, and on the top left.


Pop up your photo with some scrap chipboard.

Start making clusters of embellishments around the photo and in the upper left corner.

I made my own stick pin from the Pins & beads set, to match the theme. 


I used my Silhouette Cameo to cut out the Hooray title and adhered that on my photo

Write some journaling in the lower left corner to finish.


I love the composition of this piece and the cut pin Sandra made. 

Sandra's Shopping list 


We would love it if you can leave a comment to support our designers.

More can be seen from Sandra on her blog http://crea-sandra.blogspot.com 

Thank you for looking 

Jules xxx

Sunday, 11 March 2018

Vintage Possibilities by Jules


Hello crafty people,


I have been busy making a cover so that I can add some loose artwork and journal pages in.


I am sure you have all had these..... they are the cardboard covers which come inside new bedding, and as I love new bedding, I have plenty of them :)

I gave it 2 coats of Prima white gesso as I knew I wanted to use plenty of spray later and the gesso stops this been absorbed into your card or papers.


Using my wood grain Stencil and Prima Modelling paste, I randomly added some texture.

Next I dug out loads of resins and metal charms, tags and Scrapiniec pieces and started planning my layout before I committed to gluing down. Although because I use the Prima 3D gel for this kind of layout, and the fact it has a slow drying time, I have time to move something if it not quite right.

I was enjoying myself so much that I completely forgot to take anymore progress photos Duh.... So I will just explain........


I used cardboard to give 3d to the tags and I also cut a tag shape from the Tim Holtz woodgrain effect card. and layered them up.
Once I had a few things glued down I gave another coat of gesso so I could make sure the lower layers were coated.


It was then a case of adding embellishments and coating with gesso until I had the main design laid out. I tuck lots of things in to make it more 3D and it doesn't matter if you can't always see them, as they add depth and height.

I started to fill gaps with Prima Art Stones, and tiny jump rings, this also adds more interest and texture to your design.


Out came the Lindy's Sprays, I kept them to just 3 colours and then black & white to add depth and light.

Spary close to the piece and or take out the spray nozzle and use either the end or a brush to get the colour just where you want it.
The benefit of also gessoing the cover is you can easy wipe away colour in unwanted areas with a baby wipe.


I keep drying and respraying so that I can make sure I get the colour I want, when you spray over gesso the colours are lighter when they dry. 

The main focal point is a Prima embellishment with a Tim Holtz photo and with hard Rock Candy Crackle glaze over the top.


I finished the piece with some bling and a word sentiment.


I am really pleased with how this turned out. 

See my shopping list below 


Thanks for looking  

Jules xx