Search This Blog

Thursday, 31 May 2018

The Artist Card by Teresa

jj

 Hello crafty peeps 

Just back from a wonderful long weekend away in the Lakes, the weather was amazing and the fur babies had fun swimming at the side of the lakes, wish I could have joined in...........

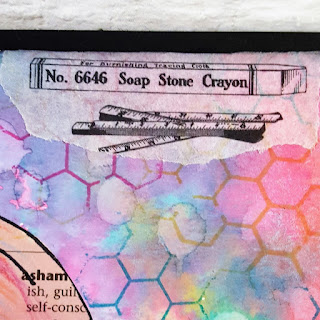
So Teresa has been getting the Distress Oxide inks out to make a beautiful card using the Girl002 plate. 

I just love the colours used and the washi tape is such a great addition to give extra interest.  


1.Layer Distress Oxide inks in various colours until you are happy with the balance. I used Picked Raspberry, Wilted Violet, Fossilised Amber, Twisted Citron, Peacock Feathers and Spiced Marmalade. 


2. Using the large honeycomb stamp, stamp randomly over the background using some of the Distress Oxide colours from the background.


3. Stamp the girl onto a dictionary page and colour with water colours and pencils. Cut out and glue onto the card base.


4. Tear elements from the printed washi tape and stick around the edges of the card.


5. Stamp the sentiment and attach with 3d foam.
6. Finish by matting onto black card.


Please leave a lovely comment to support our designers and thanks for looking. 

For more projects for Teresa please check out her blog http://thefatcactus.co.uk and You Tube Channel https://www.youtube.com/channel/UChNbVhMz7jX66gevhKgz5Ig/feed 

Jules xx


Thursday, 24 May 2018

3D Fairy Art Doll by Jules


Hello wonderful crafty people

Its my turn on the blog tonight, and I am also using the stunning Lindy's magical shakers and my Girl002 plate.

I really wanted to make a 3D project with my stamps and knew when I was designing them, that the boarder stamp in this set would make a great skirt....

Now unfortunately I didn't take step by step photos for this one, so I shall describe how it was made.


My 1st step was to find a stand I could use, I took a cardboard tube I have hanging around for an age (you could use an empty tube from a roll of foil) and painted it black, then with some white tissue paper, I stamps the flower trio with clear ink and cover with white embossing powder.

Heat set, and then wrap around the tube using a matt medium. I did get some tears but hey its mixed media right :)

I needed a base for this tube so I found some large flower hollows from old potpourri (never throw this stuff out) and glue to a piece of card and again painted black.

Stamping came next, first the girl and rows of boarders, I used some of the script stamps which I had white embossed for a different project for a belt and some left over flowers I previously stamped on fabric.


I made her body longer and drew in some arms, before adding some texture with a stencil and modelling paste.

Next came the colour, I used Spectrum Noir markers for her face and hair.

Once the boarder stamp was cut out I used a range of Lindy's Magical shakers on my craft mat, sprayed them with water  and randomly dragged the card through the colours before assembling them into a skirt shape.


I was really pleased with the multi-colour effect, so decided to use them on my resin wings as well. I normally gesso my resin first if I am adding colour, but decided to try without this time. Its harder to build the colour but again I was happy with the result.

All that was left to do was glue the wings behind the stamped image to the roll. This was harder than I expected, but using 3D gel I managed to get there in the end.

She's about 45cm tall and sitting on my shelf now, loved doing this and its given me another idea.............


Thanks for looking  


Jules xx


Tuesday, 22 May 2018

Texture Tag by Katie


Hello crafters

Katie has made a fabulous background and used the stamp plate Girl001 for the focal points.

I haven't tried this technique with modelling paste and embossing powders, but I will definately  be giving this a go 


I used Lindsey's Magicals on the base and painted them on by mixing a little water into the powders, for applying them with a different technique. 


I then used the texture stamps on the background of the tag

Next take the butterfly stencil to apply modelling paste to the tag and use copper embossing powder over the top and dry with a heat tool.


I used a mixture of marker and paint pens to colour in her face. With nail glitter for the eye make up to give her extra sparkle. 


Add a sentiment to finish


Shopping List 


If you would like to see more of Katie's projects, please check out her blog https://whatkatiedid2.blogspot.co.uk/

We would love you to support our designers and leave a lovely comment.

Thanks 

Jules xx


Thursday, 17 May 2018

Lindy's Magical Peacock Canvas by Teresa


Hello crafters


Sorry its been a while since our last blog, its just been so busy with the stamps and loading stock, plus there's been actual sun so the garden has needed some TLC :)

We are hoping to bring you a regular blog post on a Tuesday and Thursday and there's a You Tube video in the pipeline too.

Teresa has been busy making this stunning canvas with our new stamps & Lindy Magical shakers more coming on them soon.... Also the Peacock Teresa has used and the tiny paper flowers will all be uploaded to the website this weekend:)


Stamp the text stamp randomly over the canvas using the two shades of blue ink.


Stamp the larger honeycomb design with Versamark ink and emboss with gold embossing powder.


Sprinkle some Teal Magicals powder onto the fabric flowers and spritz with water to activate the colours, allow to dry.


Use the Teal and Copper Magicals with a little water to colour the chipboards and resin embellishment.


Arrange your chosen embellishments and glue in place using gel medium.
Stamp the smaller honeycomb design around the edges of the canvas using Sepia ink.


Stamp the sentiment onto some white card using Sepia ink and cut out. Glue into place with a 3d foam pad.


I finished by adding a few highlights to the edges of the canvas, and to some of the embellishments with gold gilding wax


From Teresa's own stash

5 x 7 canvas board
Archival Ink Sky Blue, Paradise Teal, Sepia
Versamark Ink
WOW Powders Superfine Metallic Gold Rich Embossing Powder
DecoArt Media Heavy Gel Medium

Treasure Gold Wax Gold Rush

Please leave a lovely comment to support our designers and thanks for looking. 

For more projects for Teresa please check out her blog http://thefatcactus.co.uk and You Tube Channel https://www.youtube.com/channel/UChNbVhMz7jX66gevhKgz5Ig/feed 

Jules xx