Search This Blog

Tuesday 27 March 2018

Live Your Dream Box Frame by Teresa

Hello wonderful Crafter's

Teresa is back tonight with our last project for March, and its a beautiful box frame, with a lovely fresh Spring vibe. 


Apply Crackle paste onto the frame through the wildflower stencil and set aside to dry.


Mix a pale duck egg blue colour using Cobalt Turquoise Hue, Blue Green Light and Titanium white, and paint over the frame and crackle paste. Once dry mix a wash of colour using Burnt Sienna and Titan Buff and apply thinly to the frame, blotting away excess with a paper towel. 

This just tones down the colour, creating a slightly timeworn vintage feel. 


Apply Rose Gold gilding wax sparingly around the edges of the frame to add subtle metallic highlights.


Use Titan Buff paint and Rose Gold gilding wax to colour the embellishments - this unifies the colour scheme allowing the individual elements to fit well together. 


Dry brush Titan Buff paint over a selection of paper flowers. Again, this tones down the individual colours slightly and coordinates the colour scheme. 


Glue the printed tissue inside the base of the box and allow to dry before colour washing with the duck egg blue colour. Apply the sienna wash to the edges and blend in. Once dry, arrange the flatter elements onto the base with 3D foam and silicon glue for dimension. 


Now add in the bulkier elements - sticking into place with silicone glue. 


Add in some bits of cork along the base and dry brush with Titan Buff paint. Cut a piece of wire mesh to fit and place over the box before fixing the frame back on top. 

Dry brush the wire with Titan Buff paint and add some Rose Gold gilding wax to knock back some of the 'silveryness'. 


Finish by adding some metal corners to the frame with strong glue. 


I love the soft vintage tones of this piece, it really feels like a romantic memory box.  


Well I love it too Teresa, the vintage feel, yet a fresh look. And I just love the wire mesh front. 

Get the look with Teresa's Shopping list below. Click HERE to go to the website. 


From Teresa's own stash
Box Frame
Crackle Paste
Silicone Glue
3d Foam
DecoArt Paints
Gilding Wax

Please leave a lovely comment to support our designers and thanks for looking. 

For more projects for Teresa please check out her blog http://thefatcactus.co.uk and You Tube Channel https://www.youtube.com/channel/UChNbVhMz7jX66gevhKgz5Ig/feed 

Jules xx


Sunday 25 March 2018

Mixed Media Birdhouses by Katie


Evening Crafters

Perfect day for Katie's post tonight, as it perfect the perfect spring day, and we have just put up the bird feeders, although judging by the state of my car this morning, they are eating way too much. Ha ha. 

Katie has decorated two fabulous bird houses. 


Start by painting both papermache birdhouses with white gesso. 

Once dry apply crackle paint. 

For the fairy birdhouse spritz with Lemon and Lime Green mist spray and leave to dry.


Use Glimmer Glam paint to colour in the Scrapiniec 
Blueberry Fairies fairy, flicking some over the bird house for extra colour.

Paint the Scrapiniec Grape Vines and glue them to the side of the bird house. Add dew drops around the sides.


For the butterfly birdhouse spray with ink.

Apply a stencil mask and once set spritz with another layer of ink.


Paint crackle paint on the top half of the bird house.

Ink it again and then paint the wooden butterflies. Add flowers to the front to finish.


Wow, don't you just love that crackle and the bright colours. Thanks Katie.

Katies Shopping List


If you would like to see more of Katie's projects, please check out her blog https://whatkatiedid2.blogspot.co.uk/

We would love you to support our designers and leave a lovely comment.

Thanks 

Jules xx


Thursday 22 March 2018

We Think Pink Scrapbook Page by Sandra


 Hello crafty People 

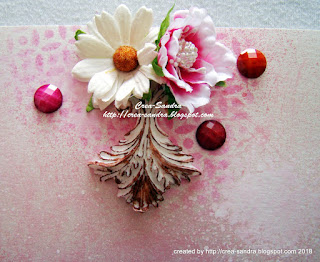
Its the second part of "Think Pink" by Sandra, with a matching layout showcasing her wonderful girls. It also goes to show that a few products can go a long way. 


I started by adding Distress Oxide through a stencil. 

Spray with pink and white spray ink, and let it dry between every layer. This creates really interesting effects in the finish 


Add some lace and pearl trim on the left side of the scrapbooking page.

Paint a wooden frame with white gesso and use some gilding wax on it after the gesso has dried.

Cut your photo to fit behind the wooden frame. 


Add gilding wax on the resin pieces too.

I made another stick pin from the Pins & beads set, these look stunning added into the side or back of a design.

Make clusters of flowers and metal embellishments around the photo, and in the upper right corner.


To finish I added a butterfly and some cabochons.


Great layout, I love the effects of spraying white and pink to layer up the colours, sets off the embellishments really well. 

Sandra's Shopping list 


We would love it if you can leave a comment to support our designers.


More can be seen from Sandra on her blog http://crea-sandra.blogspot.com 

Thank you for looking 

Jules xxx


Tuesday 20 March 2018

Finders Keepers Canvas by Teresa


Hello Crafter's

Tonight Teresa is inspiring us with a reverse canvas using a few products to show you don't always have to have a mountain of craft products to make something fabulous 


Cut paper to fit inside the reverse of the canvas, and another piece to fit around the 'frame'. Take some smaller pieces to layer up inside. 


Distress all the edges with a distressing tool or (carefully with) the blade of your scissors. Then glue into place. Add tissue paper around the sides of the canvas. 


Wrap sisal around one glass vial, and lace around a second. Glue into place with gel medium. Once secure add more gel medium and attach the texture pearls.


Glue some pearls into the bowl of a mini spoon and add a clear dewdrop to the handle. Leave everything to dry. Paint with silver paint and add layers of colour with the sprays and gilding wax. 


Pull a thread from the hessian trim and use to tie on a metal tag to one of the vials. 


Add a Quote chip to the top of the frame along with some more dew drops. 


Glue the spoon in place with gel medium and add a little Distress Ink to the tissue paper to add some colour.


And here is the finished canvas,


I love everything about this canvas, covering the mini glass vials in sisal and Pearl Art Balls is definitely something I will be trying. 

Teresa's Shopping List


Materials used from Teresa's stash
Deco Art Heavy Gel Medium
Distress Ink - Vintage Photo
Tim Holtz Quote Chip and Metal Tag
Deco Art Shimmering Silver Paint
Haematite and Copper Mica Sprays
Deco ArtTreasure Gold Gilding Wax
6 inch canvas

Please leave a lovely comment to support our designers and thanks for looking. 

For more projects for Teresa please check out her blog http://thefatcactus.co.uk and You Tube Channel https://www.youtube.com/channel/UChNbVhMz7jX66gevhKgz5Ig/feed 

Jules xx


Sunday 18 March 2018

Fairy Canvas By Katie


Evening Crafty Friends 

Another cold and snowy day here today, nowhere better to be than in a nice warm craft room. Katie is brightening our day with a wonderful fairy spring canvas.


Hi all, I have a new mixed media canvas to share using products available from Artful Days.

Start off by spraying the canvas with ink and once dry cover with gesso
Add your textures such as lace, dry wall tape and paper straws. Coat with white gesso and leave to dry.

Spray centre with Purple,Blue and red misting ink

Spray rest of canvas with lighter colours and leave to dry.

Apply a stencil mask around the edges and then glue down a selection of flowers.

Add Creating textures, Micro Beads and gems to the the canvas and flowers.

Paint the wooden word and glue micro beads to it.

Paint the resin fairy with rose gold paint to finish 


Fab canvas with lots of colour, love the gold fairy.

 Katie's Shopping List


If you would like to see more of Katie's projects, please check out her blog https://whatkatiedid2.blogspot.co.uk/

We would love you to support our designers and leave a lovely comment.

Thanks 

Jules xx