Search This Blog

Tuesday 30 October 2018

Steampunk Layout by Teresa Morgan


Hello Crafter's

Did you enjoy the extra hour at the weekend?? What did you do, sleep, clean, craft (the latter I hope:)) I managed to get more products loaded on the website - bonus, plus I finished my Halloween canvas, there are photos in the face book group - click HERE to see. 
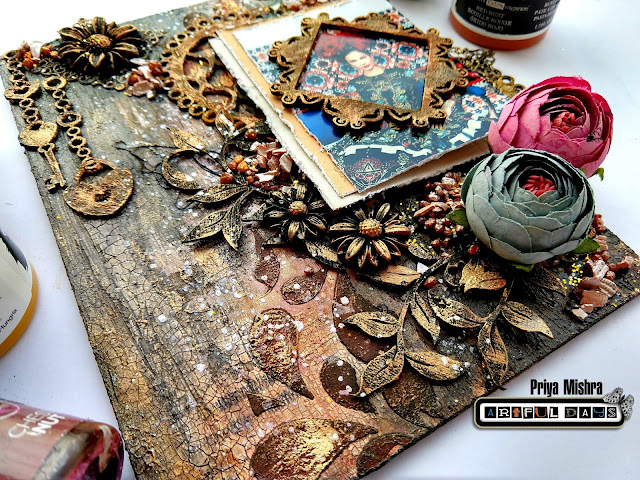
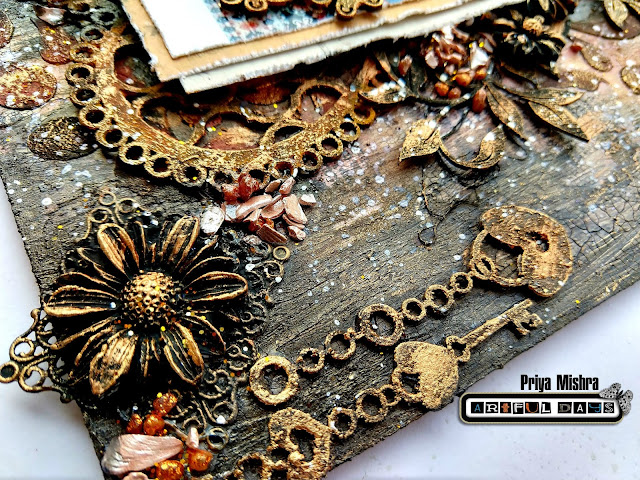
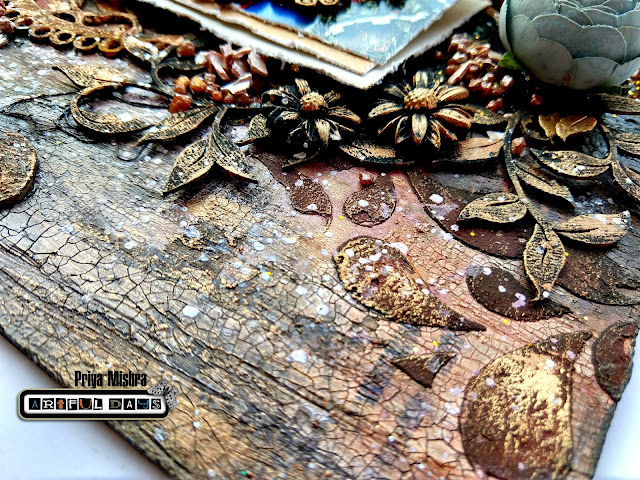
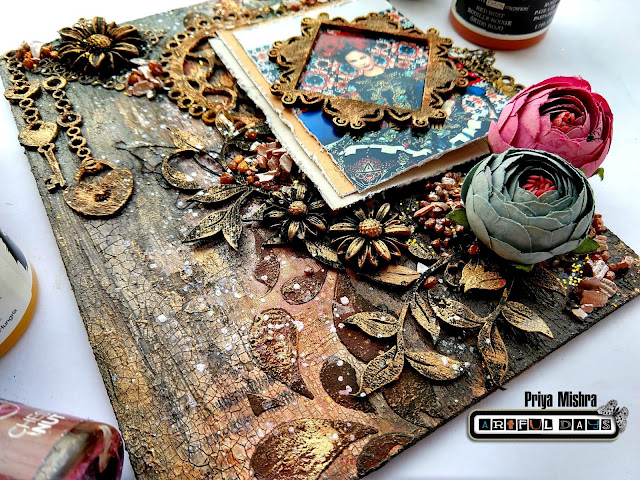
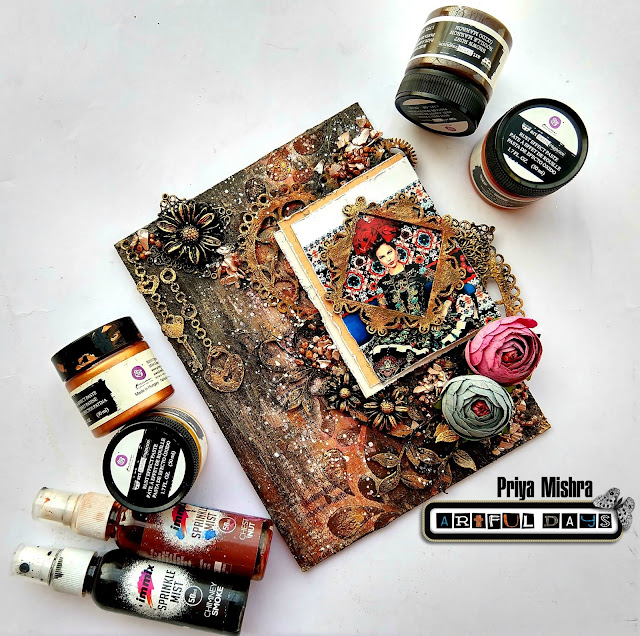
Teresa has really been mixing it up this week with a cool steampunk scrapbook layout, I love all the little elements which make this into one brilliant design. And the clever way embellishments have been used, the frame as a mirror for example. 
Be sure to have a close look 

All the products Teresa has used from our website are listed at the end of this post, along with supplies from her own stash.


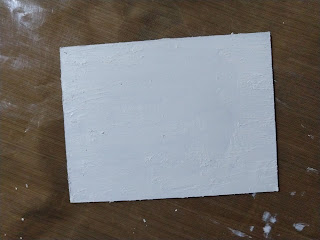
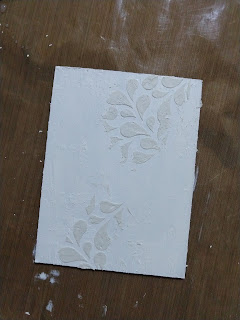
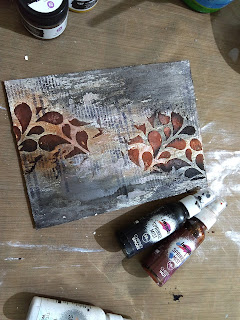
Apply Frayed Burlap and Peacock Feathers Distress Inks through the stencils onto the cream cardstock.


Arrange layers of paper and ephemera, tearing and inking around the edges with Frayed Burlap Distress Ink.


Paint the Scrapiniec shapes with black acrylic paint and add some Metallic Lustre in Rose Gold.


Choose a selection of embellishments and paint some of the metal and MDF to compliment the colour palette of the papers.

 Add an image to the Vintage Frame


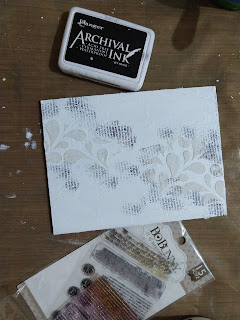
Add stamped detail using some of the background stamps from the Girl 002 set with Faded Jeans and Frayed Burlap Distress inks. 

Add some black Dewdrops.


Glue embellishments in place with heavy gel medium and allow to dry to finish


Thanks Teresa 

If you have any questions about this or any project on the blog please do ask, we are more than happy to help.

Please leave a lovely comment to support our designers and thanks for looking.

For more projects for Teresa please check out her blog http://thefatcactus.co.uk and You Tube Channel https://www.youtube.com/channel/UChNbVhMz7jX66gevhKgz5Ig/feed 

Thanks Jules xx

Products used from Artful Days


(from stash)
Distress Ink: Frayed Burlap, Peacock Feathers, Faded Jeans
12x12 Cream cardstock
scraps of coloured card
Graphic45 image
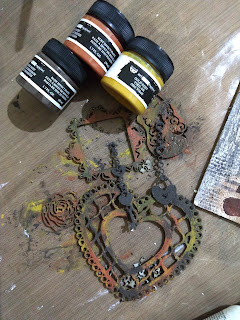
DecoArt paint: Quinacridone Gold, Black, Desert Turquoise
Metallic Lustre Rose Gold
Heavy Gel Medium
Cosmic Shimmer Acrylic Glue

Thursday 25 October 2018

Halloween Tombstone Wall Hanging by Katie Lamb


Hello fabulous crafters 

If you love making Halloween projects which are fun and bright, then this project from Katie is perfect for you. It also shows its best to keep your eye out (no pun intended...haha) for cheap things you can alter and turn into a fabulous mixed media piece. 

All the products used on this project are linked at the end of the blog.


Hello all
This project began as a wooden Halloween wall plaque from Poundland, I stocked up on a few from last year and have been creating my own shop of horrors with them. 
I look forward to my annual rummage to see what I can find to alter.
I have a short video to go with the project on creating the crackle and weathered wood effect.


I find that black gesso will cover over all the writing and print so that something like a pre-printed wall hanging can be redecorated. If you can't get hold of any black gesso then a few layers of black paint will do the trick. 


I used Crackle medium and crackle paint to get the deep cracks as shown in the video.
 

The rust is created by applying a blob of Red Oxide Fluid Acrylic Paint to the edges of the plaque and then spraying it with water so it runs down the sides. 

Once this was dry I mixed modelling paste with green ink and applied a stencil mask.


The chipboard spiders have been painted and then decorated with gems,the  Pear Drop Marbled Gems just happen to be the right shape for the spider's body.


I used ink to spray white paper flowers, these are the flat mulberry type so to get them to look like flowers I layered three flowers together and then crumpled them up whilst wet. 

I added glass eye cabochons and skull beads to the middle. 


The skull in the centre is made using a mould and paper clay. It was then painted purple with a layer of metallic paint over the top.(Readers, we have a brand new resin skull face just added to the shop - link here)

I added the pearl balls and charms around the project with a few paper die cuts.


Thanks Katie :)

If you have any questions about this or any project on the blog please do ask, we are more than happy to help.

If you would like to see more of Katie's projects, please check out her blog https://whatkatiedid2.blogspot.co.uk/

Tuesday 23 October 2018

Rustic Autumn Canvas by Priya Mishra


Hiya Crafter's 

Wow what a blog post we have to share tonight, its full of rich Autumn colours with loads of layers, some fabulous cracks and glitz. 

I love finding the AD products in a piece and I did a little squeal when I realised these little resin daises,are the flowers Priya has used on the canvas tonight. Beautiful piece, and many thanks to Priya who was under the weather when creating this canvas.


Canvas board is the best surface to use when creating a piece like this as its a good strong and flat surface 
I am now stocking 5 different sizes of the board, for all the details pleas click HERE!!

Lets see how this amazing piece has been created. 

Hi Friends,
Today I have created a mixed media canvas using Finnabair Rust effect Paste and Patina effect Paste. I wanted to make something grungy and dark for this time but in the end I added a bit of shine and sparkle as well...

And this is what I made...


So let's move on to the process of making this...
First I applied a coat of Immix crackle paste on my Canvas and when it dried completely, I created a bit of texture using AD stencil.


Then I stamped on it here and there using some script stencil and sprayed some immix Sprinkle mist chimney smoke and Chestnut for my coloring. And also colored my chipboards using rust effect paste from Finnabair.


Then I arranged them on my canvas and layered some Lemoncraft papers from AD store for my photomat. 

Finally I added some resin flowers and two beautiful from AD store. The resin flowers were first given a coat of black gesso and then some Patina effect paste. 

Then I added some glitter textures from AD store here and there. Also I added some splats of white acrylic paint in the end.

Some more pictures of the project... 


If you have any questions about this or any project on the blog please do ask, we are more than happy to help.

Please leave a lovely comment to support our designers and thanks for looking.

For more projects for Priya please click on the links below to follow & like her pages.

Blog

Thanks Jules xx


Thursday 18 October 2018

Trick or Treat Video by Reniferove


Hello wonderful people

Wow its been busy with orders this week so I would like to say a big thanks to everyone who has ordered, been a very small business I appreciate each and every order and hope you all enjoy your goodies😊

Tonight the brilliant Iwona aka Reniferove has a frightful Halloween project for you to watch. Check out the way she lays down different colours of paint and textures to make this a truly authentic old distressed piece.  She has used some small trays which held embellishments, like the ones we used a few months ago. So be sure not to throw these kind of things away as you never know when they will come in handy. 

All the products used on this project are linked at the end of the blog.  

Trick or treat?
Are you thinking about Halloween? I've been thinking since October started and today I have Halloween inspiration for you. 
I used many mediums and textures. I will not write what I did step by step, because you will see everything on the tutorial, so I invite you to watch.......


If you have any questions about this or any project on the blog please do ask, we are more than happy to help.

Please leave a lovely comment to support our designers and thanks for looking.

For more projects for Reniferove please click on the links below 


Tuesday 16 October 2018

Halloween Altered Paintbrush by Teresa Morgan


Evening crafty people 

Tuesdays blog is here, yay. We really hope you are enjoying the twice weekly blogs from our fantastic design team and finding inspiration on how to use your Artful Days goodies, I know I am 😉

Teresa has been starting to play with Halloween projects, and this one is really unique..... 
I don't think I have ever seen an altered Halloween paint brush before and how amazing to fit so many lovely embellishments on there as well, lets see how it was done x 

If you love Halloween too, join our FB Group Artful Play Days https://www.facebook.com/groups/1897689496969127/?ref=bookmarks for a free download of scary Halloween words. 

All the products Teresa has used from our website are listed at the end of this post, along with supplies from her own stash.


Paint the paintbrush with Pyrrole Orange and Quinacridone Gold paint and allow to dry


Cut a narrow strip of hessian and wrap around the metal ferrule using a little gel medium to hold it in place. Add some decorative twine and tie in a bow, trim ends. 


Paint the circle frame, bird, and metal embellishments with black acrylic paint and allow to dry. 

Paint the resin pumpkin using Pyrrole Orange and Quinacridone Gold, paint the resin star using Peacock Pearl. 


Add some twine as a hanger and glue on the metal embellishments using gel medium.

Apply some Turquoise Inka Gold to highlight the detail. 


Glue the paper flowers and bird in place along with the clock face.

Add some black paint and decorative blue sand to the pomegranate seed heads and add to the arrangement

Tuck in some miniature fairy lights and blue art balls. 


It's all in the details.


If you have any questions about this or any project on the blog please do ask, we are more than happy to help.

Please leave a lovely comment to support our designers and thanks for looking.

For more projects for Teresa please check out her blog http://thefatcactus.co.uk and You Tube Channel https://www.youtube.com/channel/UChNbVhMz7jX66gevhKgz5Ig/feed 

Thanks Jules xx

Products used from Artful Days

Teresa's own stash
Paintbrush
Twine
Gel Medium
DecoArt Media Paints: Pyrrole Orange, Quinacridone Gold, Black, Peacock Pearl
Inka Gold - Turquoise