Search This Blog

Thursday 29 November 2018

An Artful Altered Bottle by Priya Mishra


Evening all

Well I love an altered bottle and I have a few stashed around my craft room which I have picked up from charity shops and car boot sales. Of course wine, beer and even pop bottles can be used to make a stunning project.
When Priya sent me her project for tonight I was in awe of the amount of stunning embellishments used, and you can feel the texture in this project. Using the filigree shapes is really easy on a bottle because the bend so easily, to curve around any shape of bottle.

We would love to see any designs you make based on any of our blogs and you can share them in our craft group Artful Play Days, you can also ask us any questions on how to make the projects we share. 

See the list of everything used at end of the blog.

Hello Crafty Friends,

Today I am Sharing an Altered Bottle with you all. Altered art is one of my favourite techniques and I love How we can transform simple things into some awesome masterpieces.


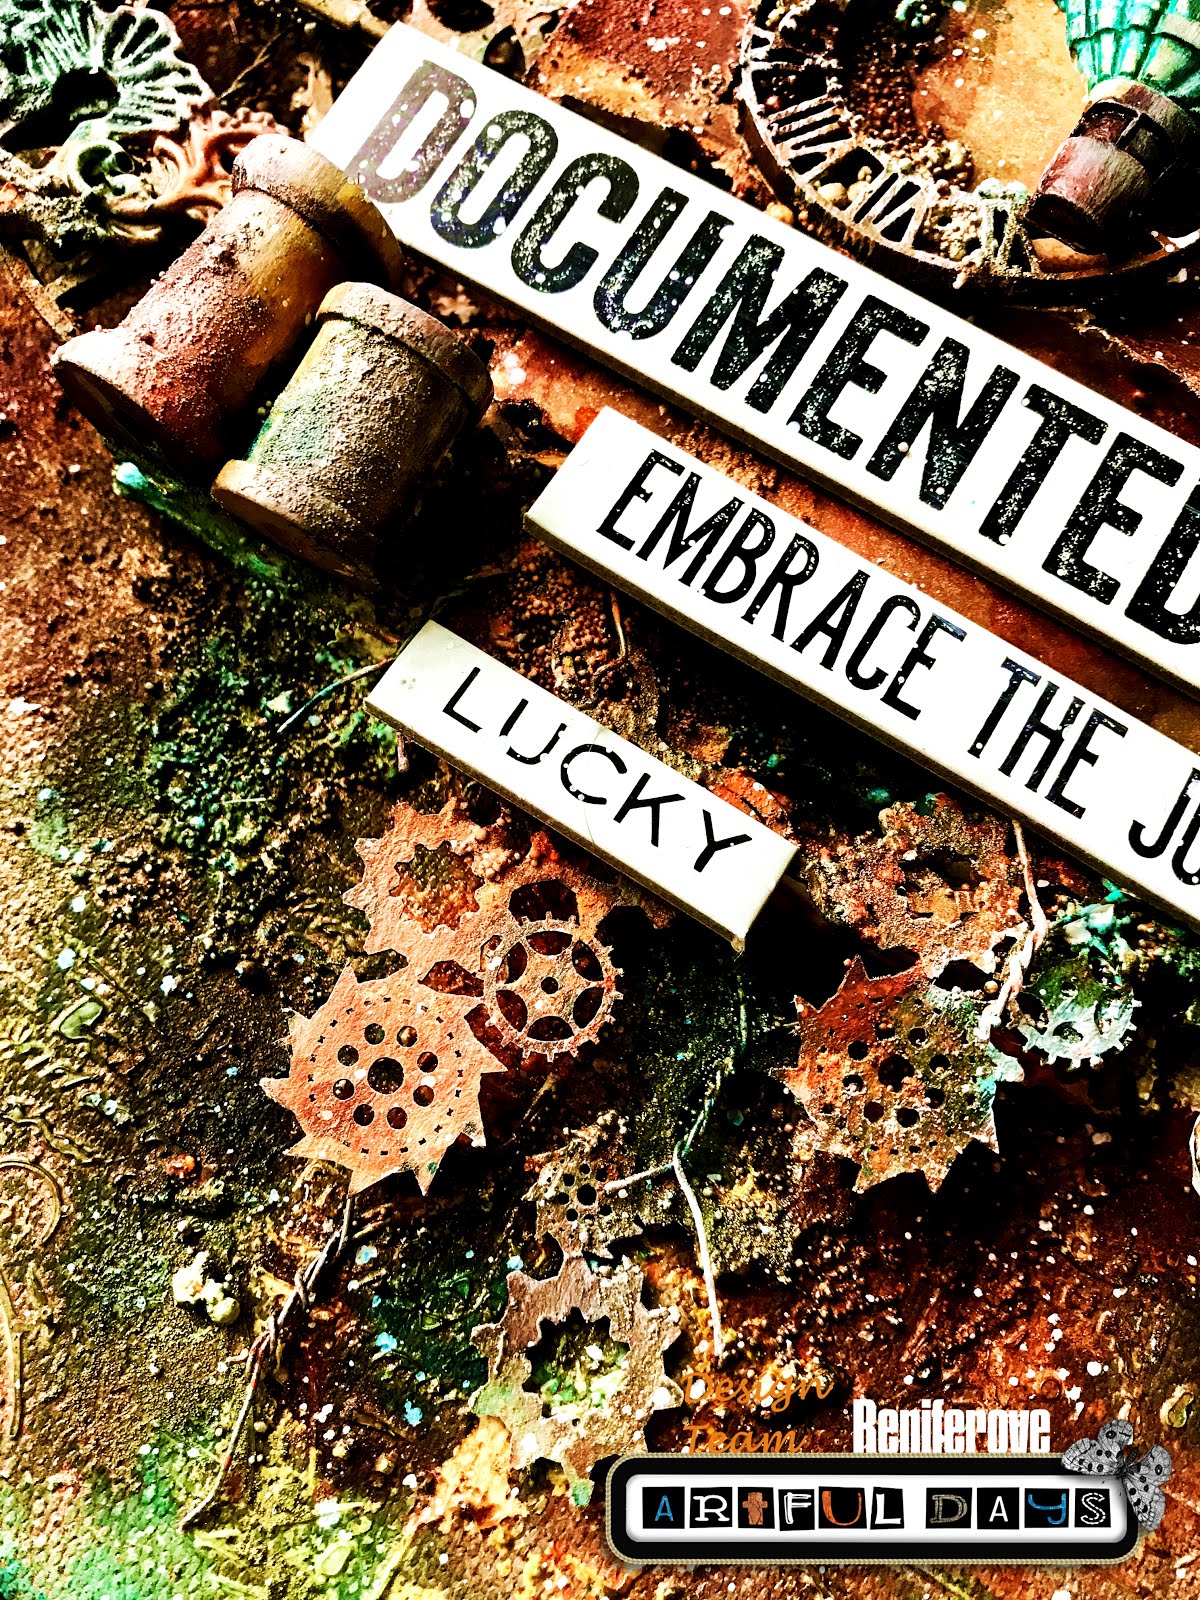
For this I used AD MDF, metal filigree embellishments and lace along with the Texture stones.

For colouring this piece I used Finnabair Metallic Paints and waxes.


First I gave a coat of black gesso all over followed by some stencilling.

Then I glued some lace on the neck of the bottle and attached some chipboard.

I layered some more chipboard on the centre of the bottle.


Then I attached the Heart with wings MDF on the neck of the bottle and some flowers.

I added some texture stones and texture sand  here and there.

Then I covered the whole bottle with black gesso again.


Once it is completely dry, I started applying colours.

I dry brushed with metallic paint Ancient Coin and Dark Violet.
Then I applied some Vintage Gold and Mystique Turquoise wax all over.


Thanks Priya

If you have any questions about this or any project on the blog please do ask, we are more than happy to help.

Please leave a lovely comment to support our designers and thanks for looking.

For more projects for Priya please click on the links below to follow & like her pages.

Blog

Thanks Jules xx


Tuesday 27 November 2018

Steampunk Imagination by Reniferove


Hello Crafters

First please can I say a massive thank you for all the orders from the weekends big sale, I am nearly caught up with packaging a posting them all, phew. 
If you missed it, then we still have some clearance items left. still at fab prices just click here  

Back to the blog and Reniferove, and wow another truly inspiring product. There so much to look at, the way the wire mesh has been used, the texture, composition, and what about those colours. We love our rust colours here at Artful Days and with patina colours added well can it get any better:)

For details of the products used, please see links at the end of the blog. 

Hello

Today I have prepared a steampunk canvas for you. 

I felt like a big project with lots of elements and I decided to use everything that suited the steampunk style.


At work you will find a balloon with resin chipboards, mdf clocks and one of my favourite products, metal wire mesh.       


After gluing all the elements, covering the whole with balls and sand paste, I took a picture for you so that you could look at how many elements are there.

After drying, I covered the entire white gesso and started adding colours. 
I mainly used Magicals from Lindys Stamp Gang from Industrial Chic sets, Autumn Leaves and Octoberfest Orange Shaker. 

To strengthen the colours, I also added alcohol inks in brown, turquoise and blue, as well as Fluid Acrylic DecoArt in Vermilion colour.

I hope you like the design, and I invite you to shop in the store.


Thanks Reniferove 

If you have any questions about this or any project on the blog please do ask, we are more than happy to help.

Please leave a lovely comment to support our designers and thanks for looking.

For more projects for Reniferove please click on the links below 

Thursday 22 November 2018

Peace at Christmas by Teresa Morgan


Hello Crafters

Firstly, our BIG sale starts tonight at 8pm, I say BIG, because theres a massive 50% off everything in our Sale category.
We always provide FREE UK postage on order over £20, but for the next 4 days it will be reduced just £1 for any orders under the value of £20.

The link to the website is HERE :)


So on to tonight's blog post with Teresa, she has taken large MDF letters, our beautiful Christmas resins and made another stunning Christmas project. 

Its also in my Christmas colours and would look stunning on any fireplace or windowsill :)


Paint the MDF letters and plaque with a couple of coats of metallic paint, and set aside to dry.


    Give the resin shapes a coat of gesso and let dry. 

    Mix a little gold gilding polish with water to create a wash and apply to the resins allowing the colour to settle in the details. 

    Once dry, use your finger to apply white gilding polish to the surface, highlighting the texture.


    Use heavy gel medium to attach the letters and resin shapes, then use a coarse texture paste to create 'snow' around the base of the letters.


    Sprinkle white and silver sand over the texture paste while wet to add extra interest, and add silver and gold Sparkle Spheres, along with white Pearl art balls. 

    Apply a small amount of gel medium to the tops of the MDF letters and sprinkle white sand over for more snowy detail.


    Thanks Teresa 

    If you have any questions about this or any project on the blog please do ask, we are more than happy to help.

    Please leave a lovely comment to support our designers and thanks for looking.

    For more projects for Teresa please check out her blog http://thefatcactus.co.uk and You Tube Channel https://www.youtube.com/channel/UChNbVhMz7jX66gevhKgz5Ig/feed 

    Thanks Jules xx

    Products used from Artful Days


    Products (from stash)
    MDF letters
    MDF plaque
    DecoArt Extreme Sheen Metallics
    Pebeo white gesso
    DecoArt Metallic Lustre
    Creativ Coarse Texture Paste

    Tuesday 20 November 2018

    Deer Head Canvas Video by Katie Lamb


    Hello again Crafters

    Am I allowed to say this - only 34 days until Christmas - eeek!!

    Where has this year gone, seems like yesterday I was complaining about the heat in summer:)

    Katie started making her Christmas Cards ages ago, very organised and tonight she is making us a Christmas hanger, using your favourite Christmas resin piece the deer head. ( I have restocked them loads of times for you:)

    Its full of texture and I like the way Katie uses lolly sticks glued together to make a surface and also using a gel medium to stick embossing paste too.

    Click on the link below to watch, all our products are linked at the bottom of the blog.


    Thanks Katie :)

    If you have any questions about this or any project on the blog please do ask, we are more than happy to help.

    If you would like to see more of Katie's projects, please check out her blog https://whatkatiedid2.blogspot.co.uk/

    We would love you to support our designers and leave a lovely comment.


    Thanks 

    Jules xx


    Artful Days Shopping list


    From Katie's Stash 


    Lolly sticks
    DecoArt Crackle Paste
    DecoArt Black Gesso
    DecoArt Heavy Gel Medium

    Thursday 15 November 2018

    Stay Simple with Reniferove


    Welcome 

    Today I have prepared something simple for you, but even simple projects can be very effective.

    In the project, I used the fantastic resin castings from AD, created compositions from them on an MDF plate and covered with black gesso. 

    To give colour I reached for Prima waxes in various colours. 

    I decided on the shades of red, copper and gold, and to make the project more interesting I added a bit of green.


    Thanks Reniferove 

    If you have any questions about this or any project on the blog please do ask, we are more than happy to help.

    Please leave a lovely comment to support our designers and thanks for looking.

    For more projects for Reniferove please click on the links below 

    Tuesday 13 November 2018

    It's a Christmas Door by Teresa Morgan.


    Evening Crafter's

    We recently added Christmas products to the website, including some Christmas resins, the one Teresa is using today is amongst one of my favourites. I don't know what it is about stags & reindeer, but I absolutely love them used in mixed media, paintings, home decor you name it. 
    So when I saw this project from Teresa I instantly fell in love, the icy colours, the sand which looks like snow and of course the deer head on the wreath. 

    Lets see how its been created :)

    All the products used are linked at the bottom of the page.


    Start by cutting four rectangles from grey board and attach to the MDF plaque to look like the panels of a door. 
    Coat with gesso.


    Apply a coat of metallic paint to the 'door' and allow to dry before adding a coat of Weathered Wood crackle medium. 


    Once this has dried apply the pale blue paint and allow to dry naturally to a crackle finish.


    Add highlights of silver gilding polish to the edges of the door and panels.


    Paint the chipboard wreath green - this will form the base to the moss wreath.


    Paint the resin deer head using the lighter shade and once dry apply a wash of the darker shade to highlight the detail.


    Use gel medium to attach the chipboard wreath to the door and add small pieces of moss to it. 

    Glue the deer head in the centre and add a ribbon bow.

     Finish with Sparkle Spheres.

    Add white and silver sand to represent snow on the wreath, deer, and edges of the door and base.


    Thanks Teresa 

    If you have any questions about this or any project on the blog please do ask, we are more than happy to help.

    Please leave a lovely comment to support our designers and thanks for looking.

    For more projects for Teresa please check out her blog http://thefatcactus.co.uk and You Tube Channel https://www.youtube.com/channel/UChNbVhMz7jX66gevhKgz5Ig/feed 

    Thanks Jules xx

    Products used from Artful Days


    Products (from stash)
    MDF Plaque
    DecoArt Heavy Gel Medium
    Ribbon Bow
    DecoArt Americana Weathered Wood
    Inka Gold - Silver
    Pebeo White Gesso
    DecoArt Americana Metallics - Tin
    Decoart Crafter's Acrylic: Spa Blue, Holiday Green, Pebble
    DecoArt Media Fluid Acrylic - Burnt Umber
    Green Moss