Search This Blog

Sunday, 15 October 2017

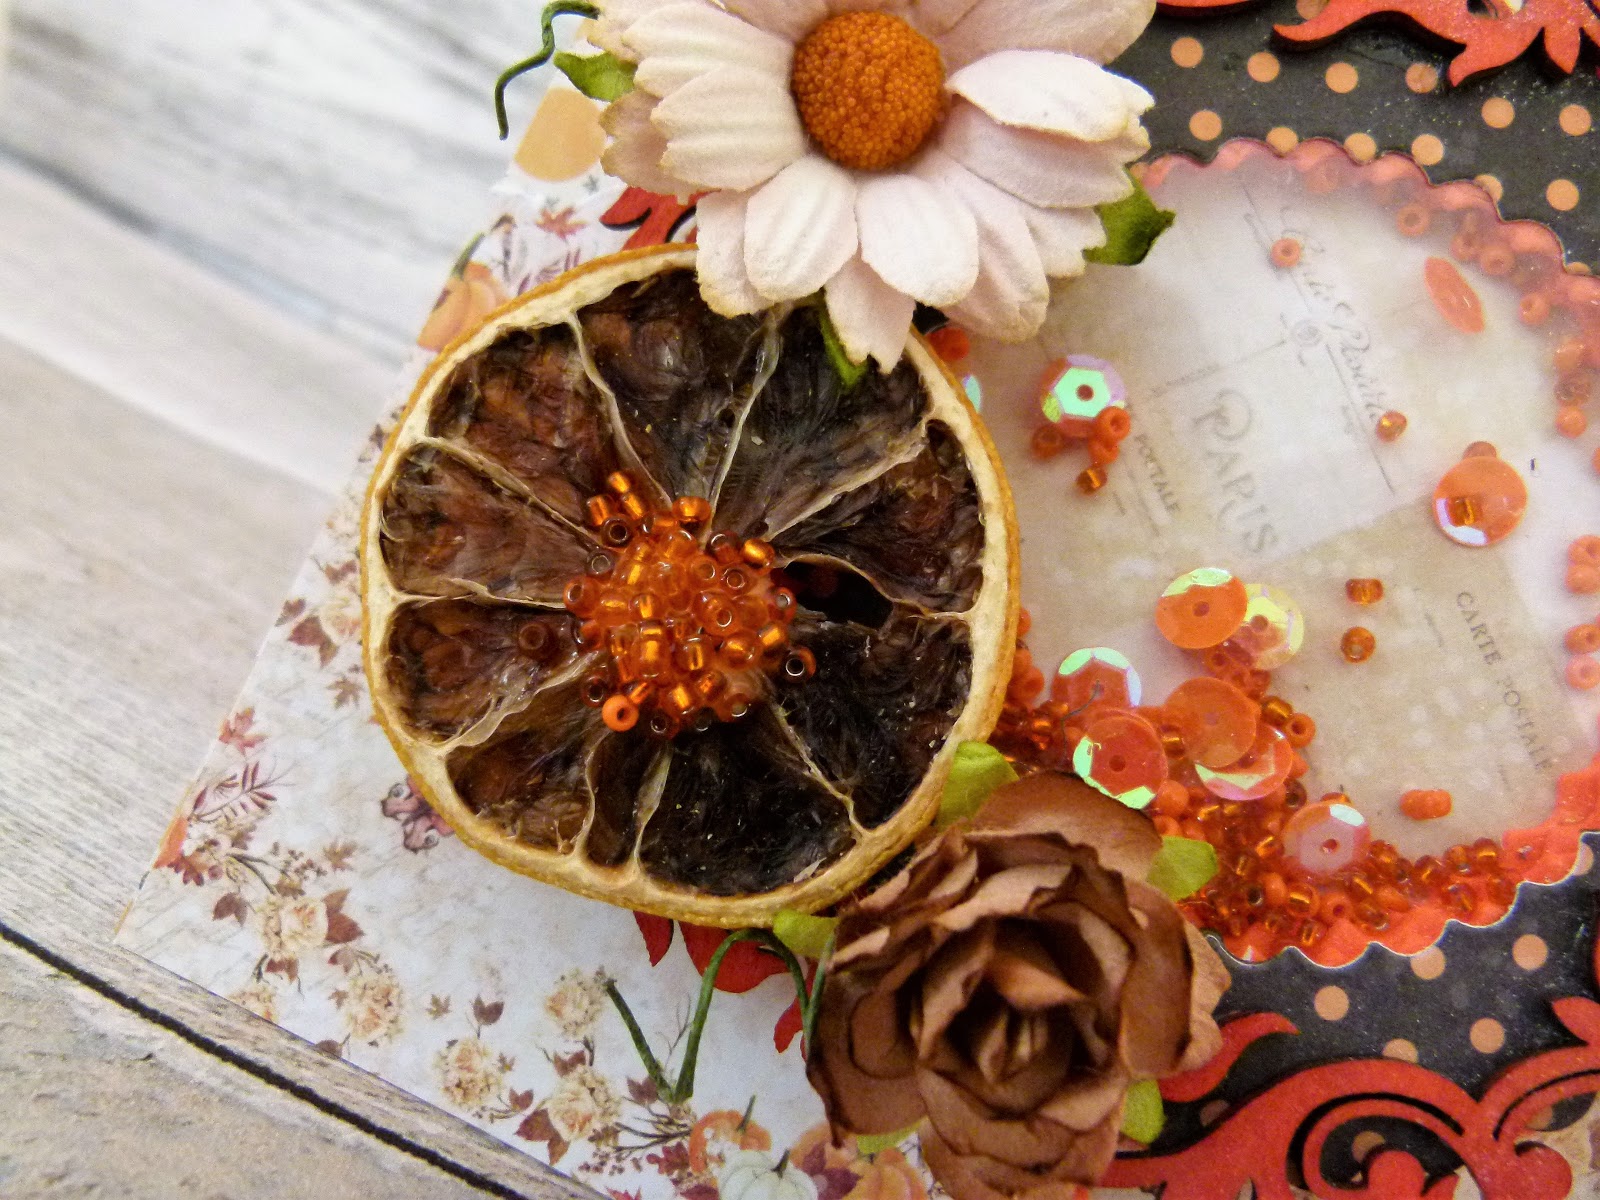
Autumn Shaker Card by Katie Lamb

Evening Crafter's

So we are back with some inspiration for using your October Changing Seasons Goodie Box.


Katie is first up with this fantastic shaker card, She added her own Sequins & Beads with a foam sentiment.

  • Cover a 6 x 6 card with patterned paper.

  • Cut out a strip of patterned paper and adhere to the card centre.
  • Cut out another layer and add a fancy edge to the bottom using a die cutter
  • Using a nesting die, cut out 3 circle frames from craft foam and glue them together

  • Next cut out a circle from card and acetate, Glue the craft foam circles to the base and fill with sequins and beads before adding the acetate over the top. Cut out another circle frame from patterned paper and add to the top off the shaker box
  • Paint the wood wreath with orange acrylic paint and once dry adhere it to the top of the shaker box.
  • Add paper flowers around the frame and a piece of dried lemon


  • Add beads to the centre of the lemon slice.,
  • Finish by die cutting a sentiment out of craft foam.

What a fabulous use of the embellishments from the box to create this stunning card, its really one to recreate. 

If you would like to see more from Katie please check out her blog https://whatkatiedid2.blogspot.co.uk/

Please support our designer and leave a lovely comment.

Thanks for looking 

Jules xx 


Just added some NEW Christmas embellishments to our Treasure Trove, check them out HERE!


Sunday, 24 September 2017

Sparkle Scrapbooking Page by Sandra

Evening folks, well where did that weekend go, did you do everything you wanted? I sure didn't get everything done (again!!!)  :) :)


Sandra is back, with another cute 6x6 scrapbooking page using the Tweet Tweet Goodie Box 


  • Start by adhering a piece of designer paper to the grey board, and ink the edges with brown ink.
  • Coat designer paper with clear gesso en let it dry completely. If you want, you can use a heat tool for that.
  • Add some gelatos to the centre of the paper and spray some water on it. Rub it out with your finger to the area you want.
  • After drying, add some texture with a script stencil and some modelingpaste.
  • Separate the bird from the Wooden Bird flower, and cover both pieces with embossing ink. Pour some Frantage embossing powder over it and melt it with the heat tool.


  • Add a strip of double sided adhesive and wrinkle a strip of fabric. 
  • Adhere the embossed flourish on the page, and add some sisal.
  • Mat the picture with some green designer paper and adhere over the bottom part of the flourish.
  • Adhere the bird on the lower left corner of the picture.
  • Add two pink flowers on the lower right corner.
  • Adhere the leaf charm, the metal leaves and a resin bird, and finish it off with some sparkle gems.


So beautiful with a shabby chic feel. I love that fact the material have been cut and gathered and the little wooden bird has been cut, adding the Frantage is another lovely idea.

We would love it if you can leave a comment to support our designers.


More can be seen from Sandra on her blog http://crea-sandra.blogspot.com 

Thank you for looking 

Jules xxx


http://www.artfuldays.co.uk/


Saturday, 23 September 2017

Shabby Chic Birdie Wall Hanging by Teresa

Hello Crafter's 

Its been a busy day here's sorting a photographing products for the new part of the website, the Treasure Trove, we would love you to stop by and have a look, link is at the bottom of the blog. 


We have another fabulous post from Teresa tonight, with more inspiration on using your Tweet Tweet Goodies Boxes. 

Shabby Chic Wall Hanging

1. Cut one of the pieces of grey board into four squares, these will form the base of each panel.
2. Cut the woodgrain patterned paper into 3 inch squares and distress the edges with a paper distressing tool before gluing onto the greyboard panels. Use Frayed Burlap Distress Ink to add a little colour around the edges.


3. Choose some contrasting papers and cut pieces to layer over the wood grain. Distress the edges as before then glue in place.
4. Colour the resin embellishments with alcohol inks to age them.
5. Attach the embellishments along with some of the pretty paper flowers to each panel. I used some wire to create a 'swing' for one of the birds to sit on).
.


6. Add some sentiment stickers


7. Use the ribbon from the packaging to create the hanger.


I absolutely love the wall hanging using the resin embellishments and the shabby chic feel from Teresa, its fabulous I am sure you will agree.

We would love it if you can leave a comment to support our designers.

More from Teresa can be found on her blog - http://thefatcactus.co.uk

Thank you for looking 

Jules xxx


Friday, 22 September 2017

Tweet Scrapbooking page from Sandra

Hello Crafters 

And we are into the weekend, hope you have some crafty fun planned!!!

Sandra has her first ever project today and its a stunning                                                      6x6 scrapbook page made the Tweet Tweet Goodie Box.


  • Ink the edges of the greyboard with dark brown ink.
  • Trim the designer paper slightly smaller than the greyboard and adhere on top.
  • Mat the pictures on some green designer paper.


  • Create some texture with a stencil and some modelling paste and colour on top with gelatos after drying the paste.
  • Glue some sissal on top of the colored area.
  • Adhere the pictures to the panel, over top of the sisal.
  • Add flowers, charms and sparkle gems, and add a resin birdcage in the upper left corner.


The finished page.


Such a pretty page from Sandra, with some lovely photos of her daughter.

More can be seen from Sandra on her blog http://crea-sandra.blogspot.com 

Thank you for looking 

Jules xxx


Wednesday, 20 September 2017

New Design Team and Metallic Mixed Media Panel by Teresa


Good evening Crafter's.

I am so excited to introduce you to our brand new Design Team, each month they will be bringing you inspiration on crafting with your goodies boxes and  maybe even some other products from Artful Days ;) 


Chris our resident designer


Hello! I am Teresa and I live in Staffordshire, England with my partner, my daughter and her partner and our two cats! I have been crafting in one way or another for most of my life and started card-making around 12 years ago. I decided to start blogging a few years ago, and this led to me being invited onto a couple of design teams. I love to think outside of the box, and have fun trying out new products and techniques. I enjoy altered art, journalling, and mixed media, as well as card making. When I am not covered in paint and glue, I love to get outside and enjoy the countryside. I am an avid photographer, always looking for interesting details or beautiful plants to photograph. 


Hi my name is Sandra, and I live in the Netherlands. I am married and we have 2 daughters. I have been crafting all my life, and scrapbooking since 2009. Recently I discovered Mixed Media scrapbooking, and I absolutely love this. I also love to make mini-albums, and enjoy coloring with my Copic markers as well. 


Hello, I am Katie, based in the UK and I am a mixed media artist, well i try my best :). I was a Guest Designer for Artful Days last year and I really enjoyed the challenge of creating with different products that I wouldn't normal think of using.

And then of course there's little old me and I will be popping up with a project or two.


We shall be seeing lots of projects over the coming months, but first up on tonight's blog is Teresa with a fabulous Metallic Mixed Media Panel using this months Goodie Box Tweet Tweet. 

1.Glue a piece of patterned paper onto the grey board panel. Take some scraps of scrunched tissue paper from the packaging and glue in place with Mod Podge around the edges for texture.

2. Use mica sprays in black, gold, blue and purple to cover the panel allowing certain areas of the background pattern to show through. Keep spritzing until you are happy with the effect.


3. Paint the wooden embellishments and fabric flower with a coat of black gesso and allow to dry.


4. Arrange the embellishments on the panel and glue into place with all purpose glue once you are happy with the placement. Add some of the little texture stones and a sparkle gem and carefully apply black gesso to these too. 


5. Use more mica sprays and gilding waxes to highlight the texture and shapes of the embellishments.


6. Add a sticker sentiment to finish.


I am sure that you will agree a stunning first piece from Teresa.

We would love it if you can leave a comment to support our designers.

More from Teresa can be found on her blog - http://thefatcactus.co.uk

There is still a small amount of Septembers boxes left, please visit the store on www.artfuldays.co.uk 

Teresa has kindly made us an unboxing video so you can have a quick look at the contents:) 


Thank you for looking 

Jules xxx


Monday, 28 August 2017

New DT Team Members


Hello everyone, hope you have enjoyed your bank holiday weekend. 

Firstly a massive thanks to everyone who applied, we received loads of entries for the design team call and the standard of work was really high, so you all made my job really hard lol x

I am really pleased to announce however that the 3 creative peeps joining the team are......

Teresa Morgan 

Sandra Jassen-van Mourik

Katie Lamb

Really looking forward to see all their creations and working together.

Thanks again

Jules xx


Saturday, 26 August 2017

Tea Party Time Goodie Box - White Rabbit Scrapbook page

Evening Folks

I have been working on a Scrapbook page using the August Goodie Box 


I used a 12 x 12 Hazy Days Scrapbook page to work with the 6 x 6 pages included in the box. I have had this Rabbit image for some time now and I had to use as the focal point for this box.


I started by sealing the page with Prima Clear Gesso, I use a 13 x 13 hardboard back with clips as this helps to keep the page flat when adding wet mediums.


Next whitewash the centre on the page and add colour and texture through the stencils, I also used a Seth Apter Stamp


 I used some of the straws, papers and tags from the box to start my layout, distressing the sides of the papers.


I have a flamingo, and chair die so used through in my design as well. Then it was a case of arranging all the different elements from the box. I did paint some of them to match my colour scheme.
I finished with splats of white & black paints.


I hope you like it, loves making this....

The NEW September Goodie Box is available to pre-order now on the website. www.artfuldays.co.uk 

Thanks for looking

Jules xx


Wednesday, 23 August 2017

DT Call


Hi all, we are having a Design Team call here at Artful Days.

Do you love to create mixed media projects, scrapbook pages and embellished cards??

If so I am looking for 3 talented crafter's to work with my Monthly Goodie Boxes on a bi-monthly basis and to share and shout about the products on social media.

Every other month I will send you a box to create 2/3 projects with, so you will be rotating with the other team members. Create anything you wish as long as at least 80% of the finished projects come from that months box and follows the theme.

The requirements
  • You must be able to work to very tight deadlines, all projects to be completed and blogged before the 25th of each month.
  • You will need to have a active blog and at least 2 social media accounts, Facebook, Twitter, Instagram etc.
  • I would like at least one design member to have an active You Tube account to do unboxing videos, tutorials etc
  • Be able to committ for at least 6 months with a view to extending that period.
  • Encourage and comment on fellow DT members blogs and where possible promote them as well as promoting each months box on social media.
  • Take good quality photos for the blog with step by step processes. 
We will offer you the box, and good discount off products on the website, you may also be sent extra new products to play with.

If you are interested please email me at juliebell1911@yahoo.co.uk  
  • Photos of your 3 favourite projects 
  • Links to your blog and most used social media account. 
  • A couple of sentences about you and your craft. 
  • Any other design teams you are in. 
I am looking to make a quick decision so I can send out September box to design with, so please email as soon as you can. 

I will announce the team members here on the blog.

My website is www.artfuldays.co.uk and the Facebook page is https://www.facebook.com/artfuldays.co.uk/ if you would like to have a look.

Thanks and good luck 

Jules xx


Monday, 17 July 2017

Travel Plans - Scrapbook page

Hello, well its been a very long time and I am sorry I haven't blogged any makes with the Goodie Boxes, hopefully we shall be fixing that. 
I will start with a post of a scrapbooking page I have made with our latest box called Travel Plans, as we speak there's just single figures left on the website, just go to www.artfuldays.co.uk to order yours. 


Nearly all the elements used are from the box, but I have added a 12 x 12" page, a world die, Seth Apter Stamp, Prima White Gesso, Molding Paste and some Lindy's Sprays.


I started with a the 12 x 12 " sheet of paper and used Prima Clear Gesso to seal the paper, this stops other wet mediums from soaking into the page. Then a coat of Prima White Gesso in the middle of the page, before finishing with a stencil and modelling paste. 


Next some colour, using Lindy's sprays, flick, brush and splat the colour on, not really taking much care at this stage. Also adding flicks of white paint at this stage. Stamps using the Seth Apter Stamp with Black Archival ink 


There's loads of papers to choose from this month and some jornalling cards, here I started to cut and layer them up. I also used that fab Stamps washi tape to create some lines below where I plan to add my photo.


I used a photo of one of my dogs Kayla on a boat trip on the Norfolk Broads a few years ago. All my papers and photo have been distressed, this can be done with the Prima distress tool of scissors, just be careful with those :) 


It was then a case of arranging the elements from the box, I used the little envelopes, large tag, 2 flowers, a couple of charms, Scrapiniec pieces, a stamp (love those) and a Resin camera.

Splats of Black & white paints finish the design. 

I really enjoyed digging out a photo to use in this piece, and its a great keepsake, in fact I plan to frame it.


Thanks for looking, until next time.

Jules xx
